WRITTEN BY: ZOE DUMAS
What compels you to pick up a bag of coffee? Is it a cool label design? Maybe it’s from a roaster you’re familiar with? Or, maybe, it’s because of the flavor notes. Words like “Cocoa,” “Cherry,” and “Butterscotch” leap out at you, promising a sensational cup of morning joe. These flavor profiles are a key factor in choosing the coffee we drink, but where do they come from? How do roasteries--like Lanna--decide the words to use? More importantly, how does anyone taste anything other than coffee?
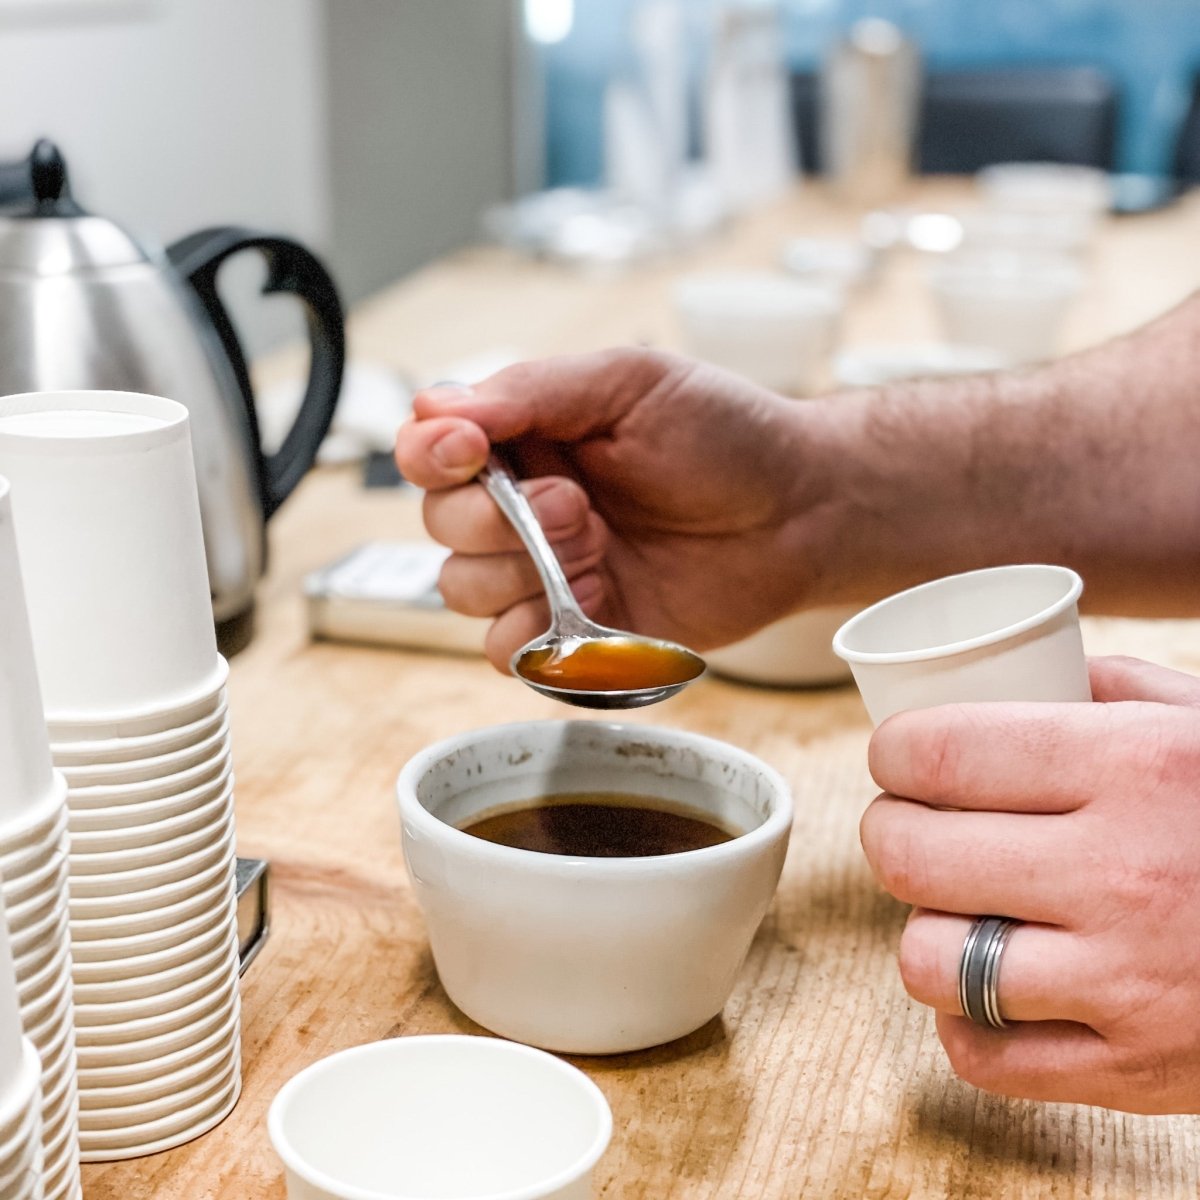
The answer: cupping! Traditionally, cupping is a practice by which everyone involved in a coffee’s life-cycle can evaluate and analyze that coffee’s qualities. Coffee buyers historically practiced coffee cupping to effectively evaluate the product they were buying; today, professionals and amateurs alike cup to develop a common coffee language.
WHY DO WE CUP?
According to the Specialty Coffee Association of America Coffee Cupper’s Handbook, cupping is “the development of a comprehensive and universally understood coffee flavor language to promote meaningful and accurate descriptions of the aromatic and taste properties of the chemical compounds present in the coffee brew.” Put simply, we can’t talk to each other about coffee unless we speak the same coffee language. Cupping together allows professionals to naturally shape the pertinent language to describe any cup of coffee they encounter.
WHAT IS CUPPING?
So that’s why we cup, but what is cupping in the first place? Basically, cupping is a systematic approach to evaluate a coffee’s aroma, taste, and body. By brewing small, concentrated batches of coffee and analyzing them at multiple stages in the process, we can understand what those flavor notes might look like in the cup.
During cupping, we ask ourselves questions like: what does it smell like? What about taste? How does the coffee feel in your mouth? These questions highlight the three stages of the sensory evaluation of coffee: olfaction (smell), gustation (taste), and mouthfeel (also referred to as the body).
As easy as it may seem on paper, differentiating some of the subtle differences within these categories can be pretty daunting in practice. For first-time cuppers, the answer to these questions often comes down to a single answer: coffee. By cupping often with both professionals and peers, amateur coffee cuppers can begin to experience coffee’s complexity. In that vein, don’t be discouraged if you don’t spout off descriptors like “creme brulee” or “meyer lemon” on your first try. Developing your taste buds means practicing: eventually, you’ll find yourself speaking that specialty coffee language like a pro.
HERE'S WHAT YOU'LL NEED
First things first, you’ll want some coffee! Choose a whole bean coffee to get the best experience. While it’s definitely possible to cup just one type of coffee at a time, we like to try 3 or 4 in a session. Coffee tasting is highly contextual, so having multiple points of reference is a vital resource for accurately identifying a coffee’s unique aroma, taste, and mouthfeel.
Another important element to the cupping process is water: it’s the primary ingredient in our brew. Bad water will make bad coffee. Use filtered water that isn’t too hard to ensure a nice, clean cup.
Now that you have your coffee and water sorted out, here are the tools you’ll need to gather for the cupping. These are: cups, spoons, kitchen scale, coffee grinder, hot-water kettle, stopwatch (or your phone), and a notebook.
Typically, professionals use small glass cups or porcelain bouillon bowls that can hold a little bit more than a standard cup of liquid. No matter the cups or bowls you choose, the most important factor here is that they are all the same. Cupping is all about capturing and recording subtle differences in flavor: don’t allow your environment or tools to interfere.
Next, you’ll want some spoons. You can buy spoons specifically designed for cupping from many online retailers, but you don’t have to. If you don’t feel like going out and buying a specialty spoon, soup spoons work just fine. You need at least two, more depending on the number of cuppers.
The third tool you’ll need is a kitchen scale. Any kitchen scale that measures in grams is perfect.
To grind the coffee, we recommend a burr grinder. Professionals tend to prefer burr grinders over blade grinders because the resulting ground coffee is more uniform. Burr grinders are more expensive than their bladed counterparts, but there are options out there under $50 that are suitable.
You’ll also need a kettle for boiling the water. While a standard stovetop tea kettle does work here, an electric kettle that is temperature controlled offers a greater level of accuracy. Many coffee cuppers, myself included, prefer gooseneck kettles for brewing, but it’s perfectly fine to use whatever spout gives you the greatest precision and comfort.
The final necessity in your coffee cupping toolkit is a notebook. Because cupping is all about developing your coffee language, it’s important that you keep track of your experiences with different brews. Then, you can compare what you find with other cuppers that tried the same.
PREPARING YOUR COFFEE SAMPLES
Tools: acquired. Let’s get brewing! Start by heating the water in your kettle to 207℉, or 97.2℃. While the water’s heating, we’ll prepare the coffees. Measure out 10 grams of each and grind them on the “coarse” setting into your cups/bowls, making sure to keep track of which coffee is which. When grinding, remember to “purge” the machine between samples. To do this, simply grind 2-3 grams of the coffee you’re about to use and then throw it out.
HOW TO EVALUATE YOUR COFFEE
Now that each of your coffees is ground, you’re ready to start sniffing. The first thing we analyze when cupping is the fragrance. The SCAA Handbook tells us to “vigorously sniff” the coffee; with your nose deep in the bowl and your mouth slightly open, sniff. A word of warning: be careful not to sniff too vigorously lest you inhale some of that expensive Guatemalan natural.
What do you smell? Can you pick out any smells that remind you of something else? Here, you can find the official flavor wheel used by the SCAA. Not everything you smell will be represented on the wheel, but it’s a helpful tool for jogging your sense memory. Write down in your notebook whatever smells you identify.

By now, your water should be ready to go. Get your stopwatch ready, place the first coffee on the scale, and tare. Start the stopwatch and start pouring the water. We cup at a 1:17 ratio, so you’ll want to add 170 grams of water. Once you’ve finished the first, repeat with the remaining cups
the coffee before gently scraping any errant grounds from the liquid’s surface. Drop these in a spare cup, rinse your spoons, and repeat with the rest of the samples. Of course, don’t forget to take notes on the aromas you smell. How do they compare with the dry fragrance?
While you wait for the coffees to finish brewing, feel free to clean up any dishes you aren’t using anymore, such as the cup with the crust grounds or a rinsing bowl. When the stopwatch hits 14 minutes, it’s time to taste.

Scoop up a spoonful of coffee and slurp it into your mouth, allowing the liquid to coat your tongue and aerate against your palate. Slurping the coffee is the best way to taste the richest, most accurate flavors therein, so don’t be afraid to get loud here.
Once you’ve tasted the coffee, really think about what you tasted. What flavors can you identify? Is it sweet? Smoky? If you’re having trouble finding the right words, the SCAA flavor wheel is a great place to start. In addition to taste, how does the coffee feel in your mouth? Is it heavy and thick, or light and thin? Does it dry out your mouth, or feel particularly juicy? Take note of your findings.
Next comes the most important part: discussion! With your fellow cuppers, discuss your findings for each coffee. At this point, feel free to sip from the coffees to refamiliarize yourself with the flavors and body. Responses will range from coffee to coffee, and you’re just as likely to agree as to disagree on the coffee’s qualities when you’re just starting out. As you get more familiar with coffee tasting, you’ll become more well versed in the language of specialty coffee.
For most of us, this is where the cupping ends. Professionally, cuppers not only take note of tastes and smells; they also score the coffees. This isn’t especially helpful for the consumer coffee cupper, but anyone interested in how coffee is scored can check out more here.
And that’s it! Feel free to continue chatting with your fellow cuppers about the coffees you tasted, being sure to take note of any characteristics you might have missed. Especially when you’re cupping with more experienced coffee connoisseurs, take advantage of their knowledge and expertise. It’s likely they may have noticed something because they’re more experienced in coffee tasting, and you can add that descriptor into your coffee lexicon.
If there’s one thing I hope you got out of this, it’s practice, practice, practice. Tasting all the complexity specialty coffee has to offer takes a lot of repetition, and it can be daunting to enter this new niche. Even if you don’t taste anything more than coffee your first few rounds, don’t give up! Keep at it, and not only will you develop your coffee palate, but you’ll also cultivate relationships with other coffee lovers.


